tutorial · 2026-09-18
How to Make Clickable Picture Buttons in RPG Maker MZ with CT Picture Event Binder
Step-by-step RPG Maker MZ tutorial for turning Show Picture graphics into clickable UI buttons with CT Picture Event Binder. Learn Common Event, Map Event and Troop Event bindings, tooltips, hover/press feedback, enabled states and visual button placement without JavaScript.
How to Make Clickable Picture Buttons in RPG Maker MZ with CT Picture Event Binder
RPG Maker MZ can display pictures anywhere on the screen, but by default those pictures cannot act like real UI buttons.
CT Picture Event Binder lets you turn normal RPG Maker pictures into clickable buttons that can run Common Events, Map Events, or Troop Event Pages. It also supports tooltips, hover effects, disabled states, sounds, and visual picture placement.
No JavaScript is required.
Install the Plugin
Copy these plugins into your project's:
js/plugins/
Then enable them in the Plugin Manager:
[1]CT_DevModeManager.js
[4]CT_PictureEventBinder.js
If you want to use the Picture Placement Editor, place CT DevModeManager above CT Picture Event Binder in the Plugin Manager.
Step 1: Show Your Button Picture
Import your button PNG into:
img/pictures/
Create an event and use RPG Maker MZ's normal Show Picture command.
Example:
Picture ID: 10
Image: TEXTMSGBTN
Origin: Upper Left
Using Upper Left as the origin is recommended because it keeps the clickable area aligned with the picture.
Step 2: Create the Button Action
Open the Database and create a Common Event.
For example:
Common Event: Open Custom Menu
Put whatever event commands you want inside it.
This could be Show Text, change switches, open another interface, give items, teleport the player, or run your own event system.
Step 3: Bind the Picture
Directly after Show Picture, add a Plugin Command.
Choose:
CT Picture Event Binder → Bind Common Event
Set:
Picture ID: 10
Common Event: Open Custom Menu
Now Picture 10 behaves like a clickable button.
When the player clicks it, the assigned Common Event runs.
Adding a Tooltip
You can display text when the mouse moves over a picture.
Use:
CT Picture Event Binder → Set Tooltip
Example:
Picture ID: 10
Tooltip Text: Open Menu
This is useful for custom menus, skill buttons, inventory buttons, or icons where the purpose may not be immediately obvious.
Disabling a Button
You can temporarily disable a picture without removing it.
Use:
Set Enabled
Example:
Picture ID: 10
Enabled: false
The picture stays visible, but clicking it will not execute its event.
Later you can enable it again:
Picture ID: 10
Enabled: true
This works well for locked skills, cooldowns, unavailable menu options, or buttons that require a certain switch or condition.
Running Map Events
Pictures can also execute Map Events.
Use:
Bind Map Event
Choose the Picture ID and the Map Event you want to run.
You can either use the event's currently active page or specify a particular event page.
This allows you to reuse existing RPG Maker event logic instead of rebuilding everything as Common Events.
Creating Battle Buttons
Picture Event Binder can also be used during battles.
Use:
Bind Troop Event Page
For example:
Picture ID: 20
Troop Page: 1
Clicking Picture 20 during battle will execute the selected Troop Event Page.
This can be used for custom battle commands, ultimate skills, boss mechanics, special actions, or other picture-based battle interfaces.
Hover, Press and Sound Effects
The plugin includes built-in feedback for interactive pictures.
You can configure hover effects, press effects, scaling, color changes, click sounds, hover sounds, and disabled sounds from the plugin parameters.
This makes picture buttons feel much more like proper UI controls instead of static images.
Using the Picture Placement Editor
CT Picture Event Binder v1.3.1 also includes a visual Picture Placement Editor through CT DevModeManager.
Start your game, display your pictures, open DevModeManager, and launch the Picture Placement Editor.
You can drag pictures directly into position instead of repeatedly changing X and Y coordinates inside RPG Maker.
Saved positions are stored per map, so the same Picture ID can have different positions on different maps.
Placement information is saved in:
data/CTPictureEventBinderPlacement.json
This makes it much easier to build larger custom interfaces.
Clearing a Binding
If you reuse a Picture ID and no longer want its old action attached, use:
Clear Binding
Example:
Picture ID: 10
The existing Common Event, Map Event, or Troop Event binding will be removed.
Plugin Commands
CT Picture Event Binder provides six main commands:
Bind Common Event — run a Common Event when clicked
Bind Map Event — run a Map Event
Bind Troop Event Page — run a Troop Event during battle
Set Tooltip — display hover text
Set Enabled — enable or disable a button
Clear Binding — remove an existing binding
Example Setup
A simple custom menu could use:
Picture 10 → Inventory
Picture 11 → Skills
Picture 12 → Quests
Picture 13 → Close Menu
Show each picture, bind each one to a Common Event, add tooltips if needed, then use the Picture Placement Editor to arrange them.
That's enough to create a completely custom picture-based menu without writing JavaScript.
Conclusion
CT Picture Event Binder turns RPG Maker MZ's normal picture system into an interactive UI system.
You can create custom menus, HUD buttons, battle controls, shops, skill interfaces, inventory screens, and other picture-based interfaces while still using normal RPG Maker event commands.
CT Picture Event Binder:
https://cynthiatool.itch.io/cynthia-tools-picture-event-binderrpg-maker-mz-plugin
Explore the tools
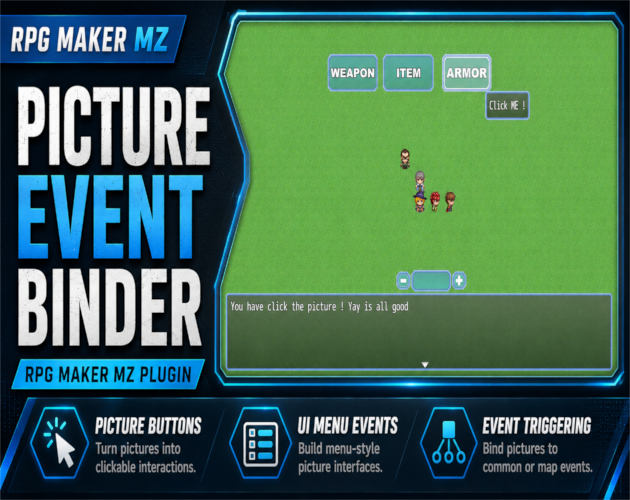
RPG Maker MZ. Normal setup uses Show Picture plus Plugin Commands and does not require JavaScript. The PEB Editor is op…
RPG Maker MZ Plugin: CT Picture Event Binder – Clickable Picture Buttons & Event Triggers
Turn RPG Maker MZ Show Picture images into clickable UI buttons for Common Events, Map Events, or Troop Event Pages with tooltips, effects, states, sounds, and visual placement.